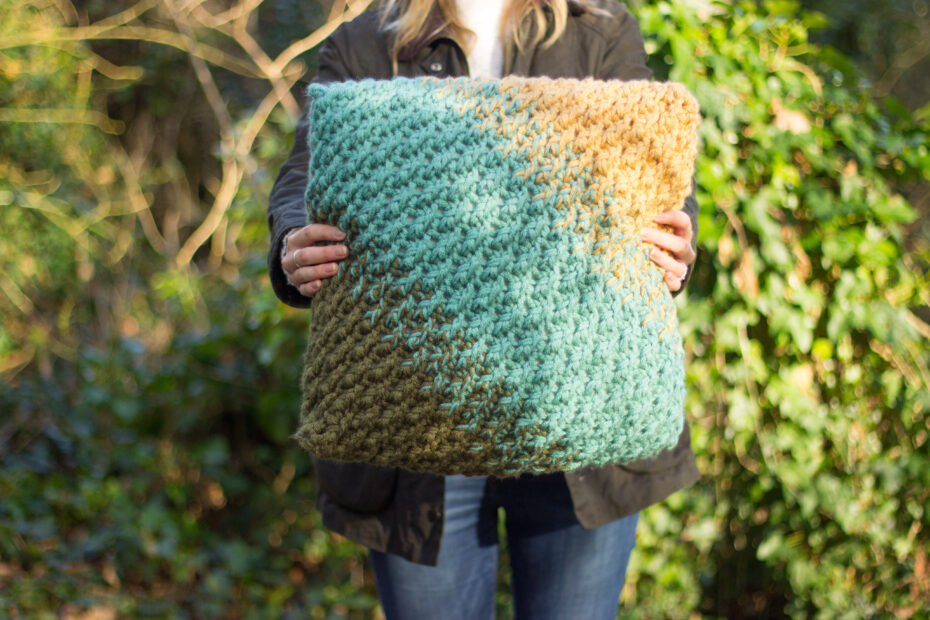
This easy crochet cushion cover uses chunky yarn held double to create a modern dip dye effect. The colours echo dense trees giving way to mountain tops and finally golden sunlight. So I figured the alpine stitch was pretty apt for a cushion inspired by forests, plus it gives a beautifully squishy textured finish – perfect for cosying up with! It’ll add a pop of colour to any room, plus the button fastening at the back means it can be easily removed and washed if needed. With travel still restricted escaping to a beautiful landscape through crochet has definitely helped me through and I hope this will do the same for you too.
Read on for the free crochet pattern, or you can purchase a printable PDF with extra photos and detail from Love Crafts, Etsy or Ravelry.

Size: Fits a 16 x 16“ (41 x 41cm) cushion pad. Gauge: 7 sts x 8 rows in alpine stitch is 4 x 4”
You will need
- 10mm hook
- 6.5mm hook (optional if covering your buttons with crochet)
- 200g chunky weight yarn in C1 – (I used Stylecraft Special Chunky in Khaki)
- 200g chunky weight yarn in C2 – (I used Stylecraft Special Chunky in Sage)
- 200g chunky weight yarn in C3 – (I used Stylecraft Special Chunky in Camel)
- Cushion pad 16 x 16“ (41 x 41cm)
- 3 x buttons approx. 2cm diameter
- Stitch marker Tapestry needle
Key
St/s – stitch/es
Ch – chain
Sl st – slip stitch
Ftr – foundation double crochet
Tr – double crochet
Tr – treble crochet
Fptr – front post treble crochet
Tr2tog – double crochet two together
Htr2tog – half treble crochet two together
Dtr2tog – Double treble crochet two together
C1 – colour 1
C2 – colour 2
C3 – colour 3
Pattern
Get a printable PDF version now from:
UK terms. Note: Hold yarn double throughout.
Row 1: With C1, fdc 38, turn. (38 sts)
Row 2: 2 ch (counts as first tr), tr in each st across, turn. (39 sts, stitch count remains the same from here until stated otherwise).
Row 3: 1 ch (does not count as st), dc in each st across, working your last dc into the top of 2 ch from previous row, turn.
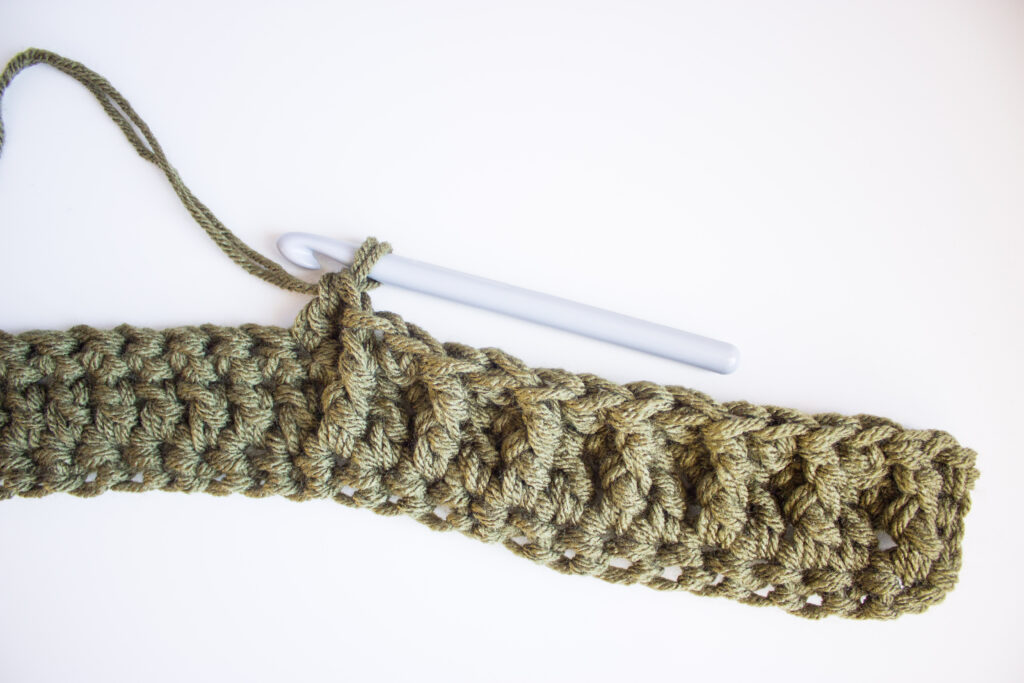
Row 4: Here you will work the fptr stitches behind alternate tr stitches in row 2:
2 ch (counts as first tr), * fptr, skip st behind, tr; rep from * until end, turn.
Row 5: 1 ch (does not count as st), dc in each st across, working your last dc into the top of 2 ch from previous row, turn
Row 6: 2 ch (counts as first tr) * tr, fptr, skip st behind; rep from * until last two sts, tr in each st, turn.
Rows 7: Rep row 5.
Rows 8 – 11: Rep rows 4 – 7.
Cut one yarn strand and tie in one strand of C2. You will be working with one stand of each colour.
Rows 12 – 15: Rep rows 4 – 7.
Cut remaining C1 yarn and replace with a second strand of C2.
Rows 16 – 23: Rep rows 4 – 7 twice.
Row 24: 2 ch (counts as first tr), 2 tr in first st, * fptr, skip st behind, tr; rep from * to last two sts, fptr, 3 tr in last st, turn. (43 sts).
Row 25: Rep row 5.
Row 26: 2 ch (counts as first tr), 2 tr in first st, * tr, fptr, skip st behind; rep from * until last st, 3 tr, turn. (47 sts)
Row 27: Rep row 5.
Cut one yarn strand and tie in one strand of C3.
Rows 28 – 31. Rep rows 24 – 27 once. (55 sts)
Cut remaining C2 yarn and replace with a second strand of C3.
Row 32 – 35. Rep rows 24 – 27 once. (63 sts)
Row 36: Rep row 24. (67 sts)
Row 37: Rep row 5.
Row 38: Rep row 6.
Row 39: Rep row 5.
Row 40: Rep row 4.
Row 41: Rep row 5. Do not fasten off.
To make up
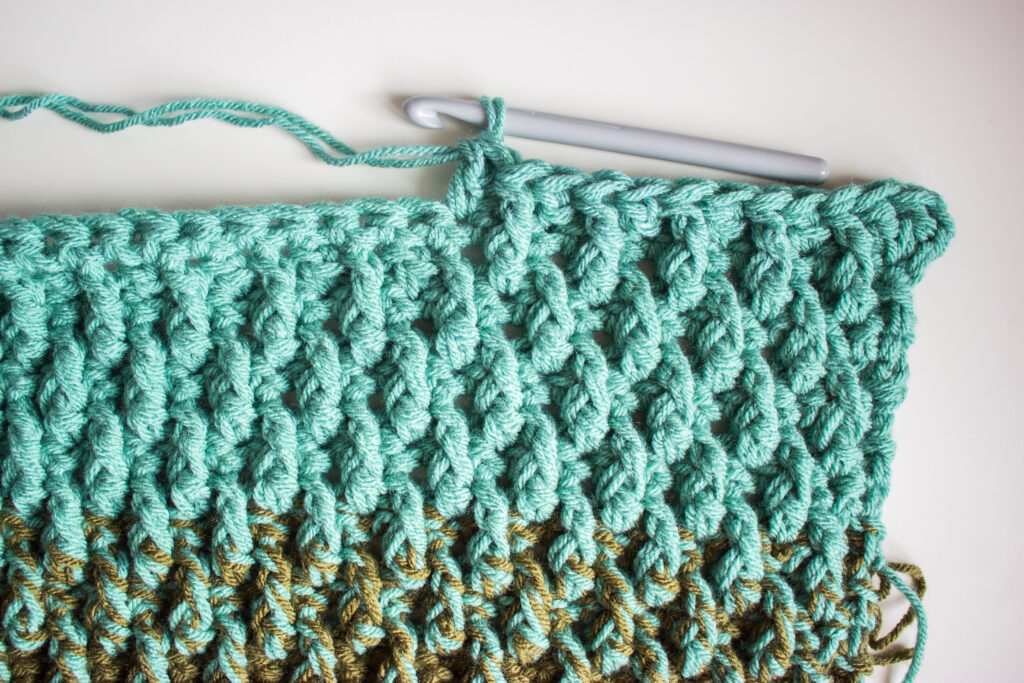
Fold each end of the C3 section into the middle to make a point, with RS together, sl st along the join. See top left image below.
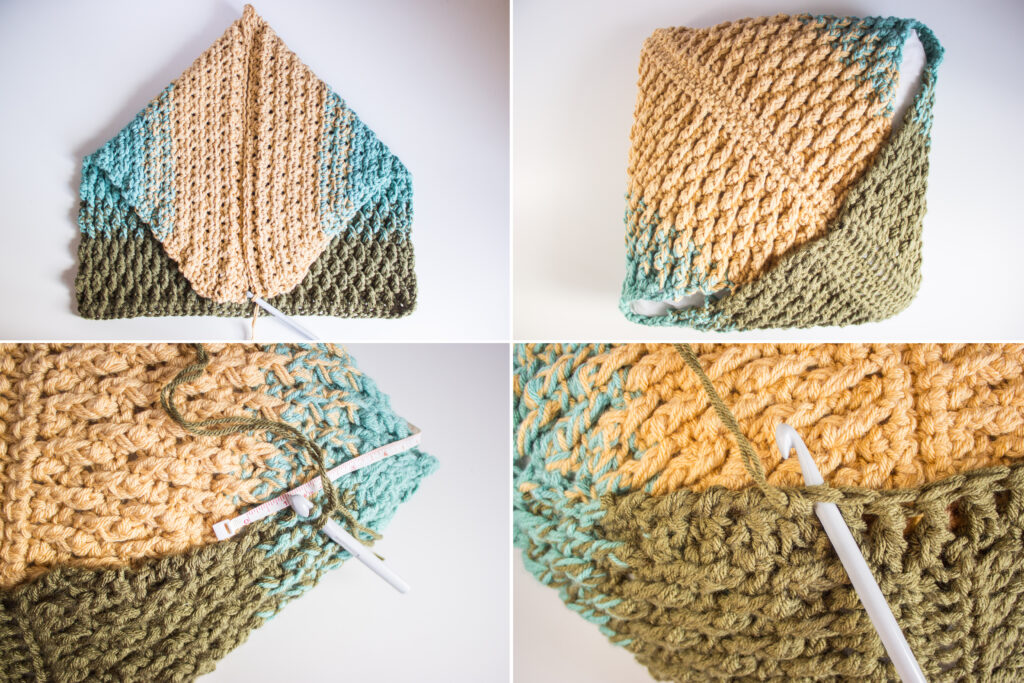
Repeat for the bottom C1 section using C1 yarn held double. You will be working into the bottom of your fdc row so will only have one loop each side to work under.
Turn right way out and insert your cushion pad. See top right in image above.
With your cushion pad inside the cover, use a single strand of C2 yarn and your tapestry needle sew the two open corners from the outer corner point in as far as the solid section of C2 colour.
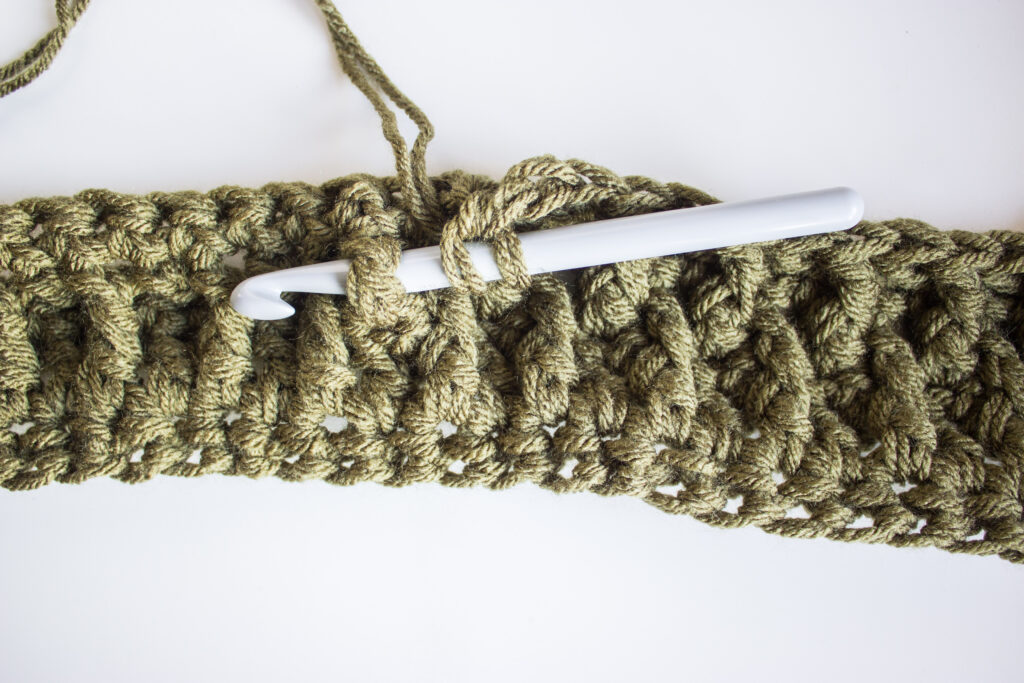
Row 1: With C1 yarn held double join yarn with a sl st on the surface of the alpine stitch, about an inch from the opening (see bottom left in image above), sl st twice more to reach the opening then work dc2tog, dc2tog, htr2tog, tr, tr, dtr2tog, dtr2tog, dtr2tog, tr, tr, htr2tog, dc2tog, dc2tog evenly along the side of your alpine stitch, ending with 3 sl st into the surface of your alpine stitch. The tallest tr2tog stitches should be in the centre of the back of your cushion, you may need to edit the row slightly to fit depending on how padded your cushion is. Do not fasten off.
Row 2: Work one row of crab stitch back across the opening flap. See bottom right in image above. To work crab stitch do not turn your work and work a row of dc backwards (left to right) along the opening, ending with a sl st into the first sl st from the previous row.
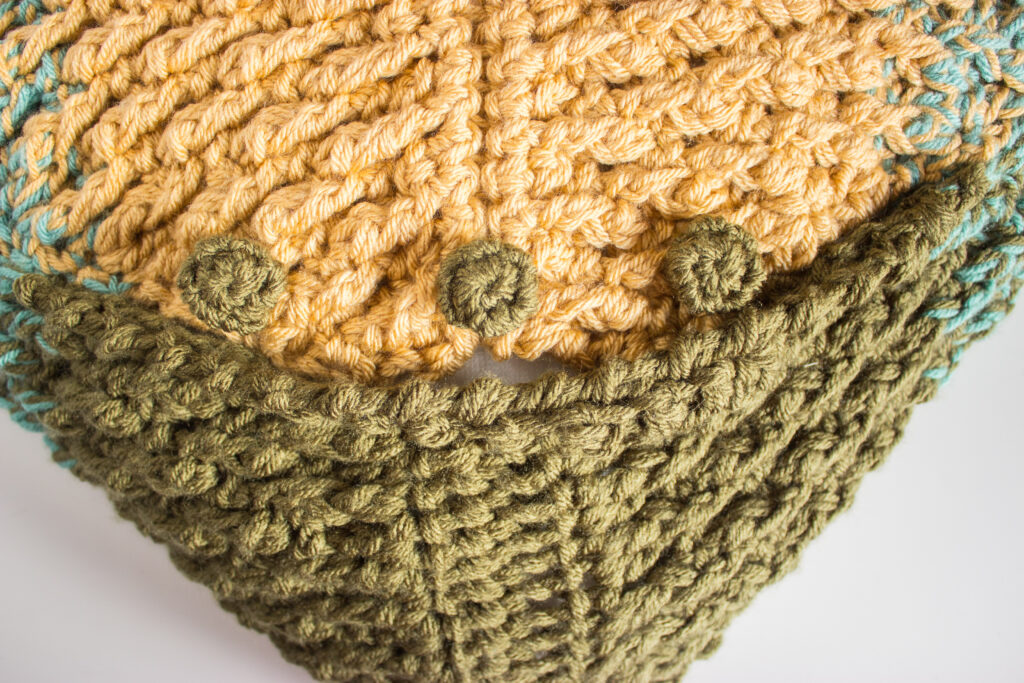
Adding buttons
Depending on your cushion thickness you could choose not to use buttons, but if you’d like to be extra sure if fastens securely and you won’t get any gaps in the back then add three buttons. You could choose any that you like, but if you don’t have any that match your yarn colours, and you can’t get to a store (pandemic times and all that) here’s a quick way to cover buttons with crochet so they blend into your cushion.
With C1 yarn (held single) and a 6.5mm hook
Round 1: 2 ch, 6 dc into second chain from hook, place marker. (6 sts)
Round 2: 2 dc in each st, ending with a sl st into your first st. (12 sts)
Fasten off and leave long tail. Using your tapestry needle thread the yarn tail in and out around the edge of the circle, insert your button in the middle and pull the yarn to close it around the button, secure with a few stitches in the back.
Check positioning and sew onto the C3 section of your cushion so that they can be fastened between the holes created by the stitches on the opening flap. Weave in all ends.
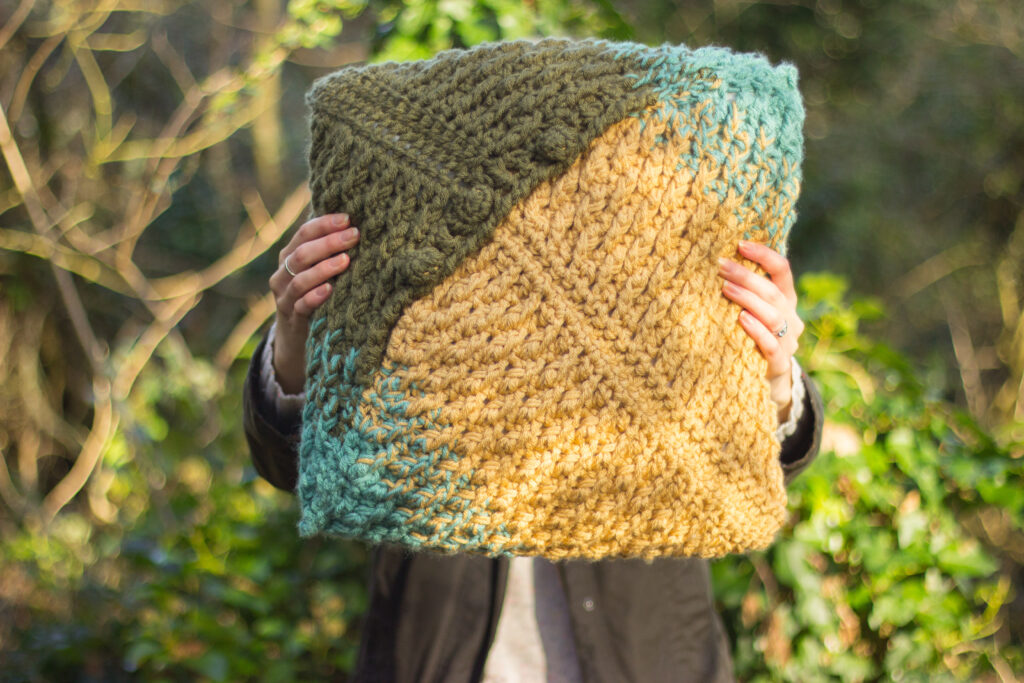
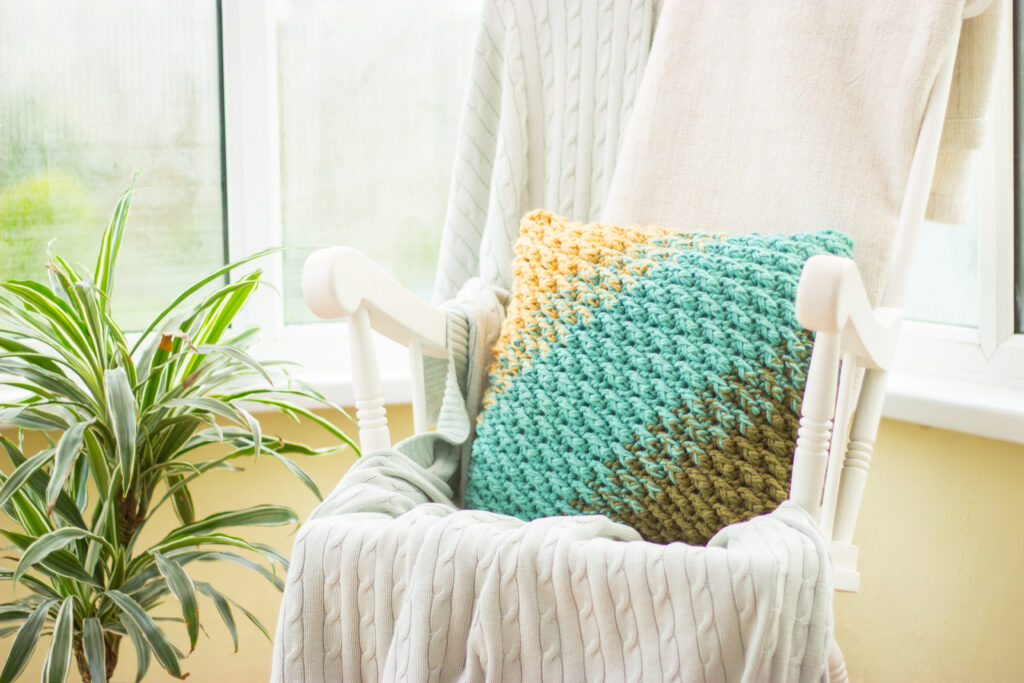
There you go – one super squishy and removable cushion cover to cheer up any room! The colour possibilities are endless too, and if you’re making a pair you could switch the colours up to have a different colour in the middle. I’d love to see and share if you make one – tag me on Instagram @victoriabeedesigns with #alpinecushioncover
Happy crocheting!
This post and pattern was originally published on The Hook Nook Life blog.